


Create curved worktop corners to match your curved units.
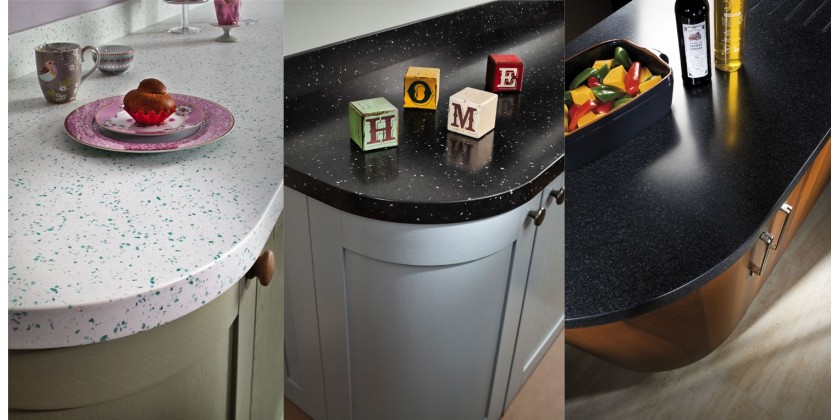
Use a 12.7mm router cutter with a 30mm collet, 3 way clamps and Earthstone jig.
Make sure to align the jig with the front edge of the worktop and 15mm from the side when placing the jig on top of the worktop; then clamp into position.
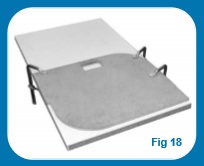
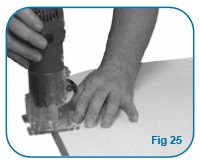
It is very important to allow the router to stop before pulling back from the edge; so from the front edge drop the router blade the full depth of the worktop and cut into the front only. This has now gone 6mm into the front edge.
Setting the router to a depth of 6mm into the worksurface, follow the full curve and length of the jig all the way to the back edge. Then plunge in increments of 12mm flowing the jig. Repeat until full cut is complete.
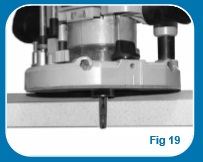
6mm of the front edge and the corner of the worktop has been removed.
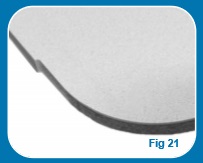
Remember as this is a plant on method to allow for 6mm curved edging to be put back on. Place the supplied pre-curved edge on the cut out to make sure a good clean cut has been achieved.
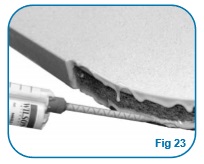
Using de-natured alcohol clean the surfaces of the cut worktop and the 6mm curved edges. Allow to evaporate dry.
A bead of adhesive is then applied to the top, bottom and front cut edges.
When positioning the curved edging strip allow for a 2mm overhang top and bottom.
Using 3 way clamps and filament reinforced tape place every 50-70mm. Ensure that an adhesive squeeze all along the attached edging can be seen from above.
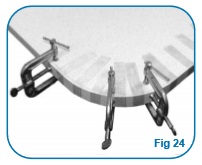
Leave this for approximately 40 minutes to dry.
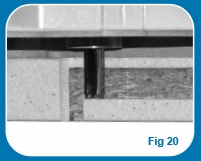
Using a laminate cutter with a bottom bearing cutter or trimmer guide, trim to flush top and bottom. Then with a 3mm radius profile cutter trim to match the factory finish.
Create curved breakfast bar corners to match your curved units.
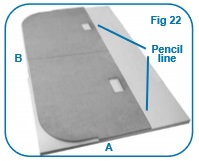
Position jig onto breakfast bar. Using a pencil, draw a line on the worktop following the sides of the jig. This gives you a guide when the jig is flipped over so both sides will match.
It is very important to allow the router to stop before pulling back from the edge; so from the front edge drop the router blade the full depth of the worktop and cut into the front only. This has now gone 6mm into the front edge.
Setting the router to a depth of 6mm into the worksurface, follow the full curve and length of the jig all the way to the back edge. Then plunge in increments of 12mm flowing the jig. Repeat until full cut is complete.
6mm of the front edge and the corner of the worktop has been removed.
Remember as this is a plant on method to allow for 6mm curved edging to be put back on. Place the supplied pre-curved edge on the cut out to make sure a good clean cut has been achieved.
Using the pencil guide lines now flip over the jig, line up and clamp. You are now going to cut backwards into the edging only.
As you are now backing into the front edge take your time as this will reduce the possibility of chipping or flaking.
You should have a breakfast bar with two curved corners ready for edging to be applied. Remember to clean the edges and surface with de-natured alcohol and dry fit the edging strip before applying adhesive.
When positioning the curved edging strip allow for a 2mm overhang top and bottom.
Using 3 way clamps and filament reinforced tape place every 50-70mm. Ensure that an adhesive squeeze all along the attached edging can be seen from above.
Leave this for approximately 40 minutes to dry.
Using a laminate cutter with a bottom bearing cutter or trimmer guide, trim to flush top and bottom. Then with a 3mm radius profile cutter trim to match the factory finish.
 WhatsApp Us
Leave a Reply Cancel Reply
All fields are required