


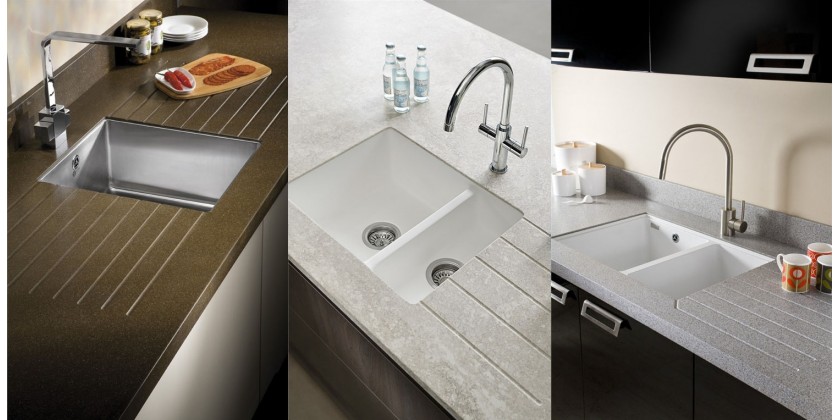
It is very important to use sharp and good quality cutters when creating the grooves as this will ensure a perfect finish and reduce the time spent on installation. If you have opted for an undermounted sink, drainer grooves are automatically an added installation process; you must process the drainer grooves after the 3mm profile has been applied to the inner edge of the cut-out but before the back face has been machined to remove the waste chipboard.
Marking and cutting out drainer grooves:
There are two drainer jigs available; one for straight grooves and another that offers left and right dog-leg design.
Start by applying masking tape to the surface to position the grooves. Using a pencil mark out the groove centre lines ensuring they are parallel to the front edge.
Place the jig over the marked out centre line and firmly clamp the jig into place.
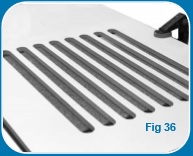
Never cutting deeper than 3mm; use a hand router fitted with a 30mm guide collet and a radius cutter.
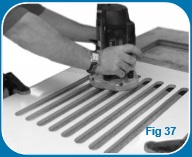
Always start from the farthest point from the sink cut-out. Plunge the router and run smoothly along the jig to create the groove. Repeat to complete the remaining grooves.
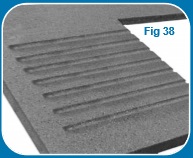
Using 240 grit paper, carefully hand sand the drainer grooves then finish with an ultra-fine Scotchbrite pad ensuring not to round over the edges of the grooves.
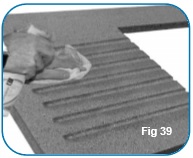
To finish sand the entire worktop with an ultra-fine Scotchbrite pad to achieve a perfect finish. Coutertop Magic polish should be applied when the entire installation is complete.

Leave a Reply Cancel Reply
All fields are required