


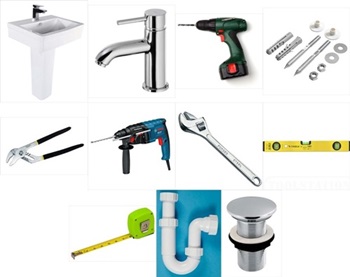
You will need the following materials and tools:
-
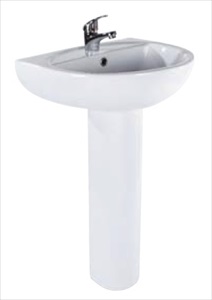
Basin and pedestal
-
Telescopic trap
-
Waste kit
-
Set of taps or basin mixer
-
Fixing kit for the basin (to secure to the wall)
-
Large and small pliers
-
Small adjustable spanner
-
Box spanner
-
Spirit level
-
Tape measure
-
Cordless drill
-
SDS Drill
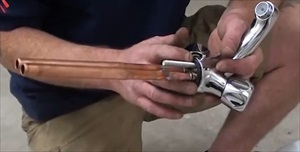
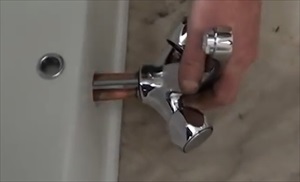
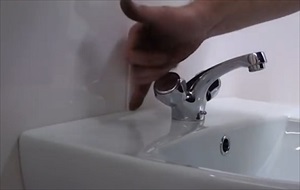
First install the taps / mixer onto the basin.
Remove the taps / mixer from the packaging; assemble the mixer as per the manufacturers’ instructions (including all plumbing pipes, washers, etc).
Most basins come standard with one tap hole; make sure your selected tap/mixer is suitable.
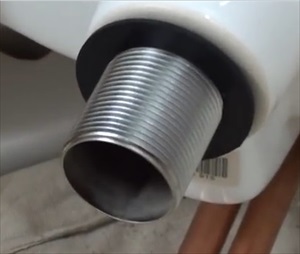
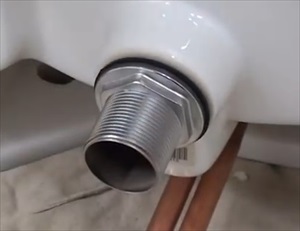
Then install the sink waste.
Simply unscrew the waste kit and insert the top part into the sink waste. Make sure the rubber washer stays on.
Now turn the sink over and put the sealer (rubber) washer onto the bottom of the waste first and then the nylon washer. Screw the back nut of the waste back on until finger tight, then use the large pliers to tighten.

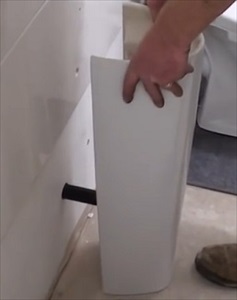
You are now ready to fix the basin to the wall.
Before you start make sure the wall behind the pedestal is clean, tiled or painted before installation.
Do not place the pedestal flush against the wall. Measure the back part of the sink and place the pedestal away from the wall so that the back of the sink fits flush against the wall.
Place the sink on top of the pedestal; make sure the grooves on the bottom of the sinks and top of the pedestal line up.

Ensuring the sink and pedestal is level (using the spirit level).
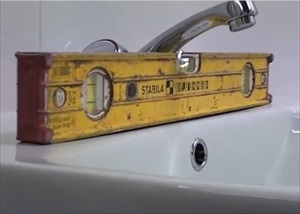
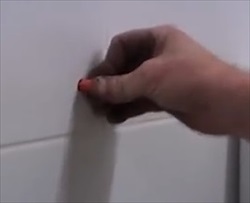
The fixings for the basin are visible under the sink (two large holes in the back of the sink). Using a pencil mark the spot where the two holes are on the wall.
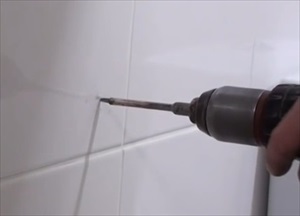
Remove the basin and pedestal; the two pencil marks should be visible on the wall.

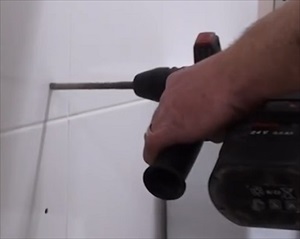
Using the cordless drill start by making two small holes where you have marked with pencil. (If you have tiles on the wall then you should use a tile bit).
The holes need to be made bigger by using the SDS drill and larger drill bit (make sure the bit size is the same size as the raw plugs provided in your fixing kit).
The SDS drill must be set to ‘spin’ and not ‘hammer’.
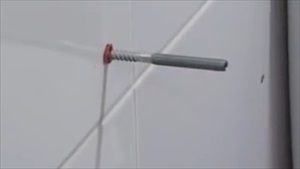
Once the holes have been drilled install the raw plugs; then install the bolts (tighten the bolts by using a small spanner).
Place the pedestal back into position and place the sink on top making sure the line up the holes in the back of the sink with the bolts secured to the wall.
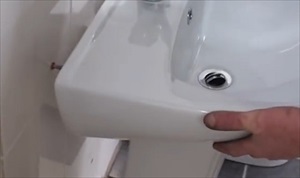
Once more make sure the sink is level and that the bottom grooves on the sink and the top of the pedestal line up.
Fix the nuts to the bolts that are secured to the wall, make sure the basin is level before tightening the nuts with a spanner.
You have now successfully installed a basin and pedestal.
The final step is to apply a thin bead of silicone between the wall and the back of the basin however this is generally done after all bathroom works have been completed.
 WhatsApp Us
Leave a Reply Cancel Reply
All fields are required