


Cutting Earthstone Worktops:
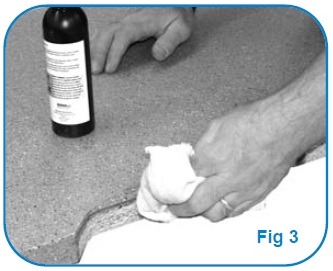
Earthstone worktops are durable, make sure to use good quality machinery and clean, sharp cutters. Using a portable hand help circular saw position the worktop and begin cutting in from the finished edge.
Using a good quality sharp triple fine tooth tungsten carbide tipped blade make two cutting passes:
1st cut: set saw blade depth at 10mm
2nd cut: set saw blade depth at 40mm
Final trimming should be made with a router, allow 5mm oversize to trim to final size.
Make sure to use a hand router with a sharp blade when cutting joint and final finished edges.
Clean all cuts, always proceed carefully when cutting toward or through the front edge to avoid chipping. Never finish the cut through a fitted edge.
Inset Sink and Hob Cut-outs:
Cut-outs can be formed using a hand router and a suitable jig or template. Clamp the jig to the top of the worktop and cut round in three stages of 12mm depth increment.
If you are using a template, mark out the cut-out using a pencil and follow the outline cutting in three stages of 12mm depth increment.
All internal corners of the cut-out must be rounded using a drill with a minimum 10mm radius. Remove all dust and shavings and clean the edges of the cut out.
Seal the inset sink cut-out using a 2mm bead of clear, water resistant silicone.
All hob cut-outs require a 50mm wide heat reflective tape around all the raw edges making sure the tape overhangs both the surface and underside of the cut-out.
Joints:
Only use the Earthstone colour matched adhesive. Always carry out a dry fit of prepared cuts and joints prior to installation or application of adhesive.
Masons Mitre Joint:
A typical mason’s mitre method with biscuits is recommended for corner joints.
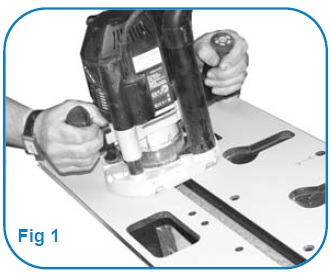
It is recommended to router through the worktop in three incremental stages with the worktop positioned as follows:
• Left hand 90° joint - female joint router face up - male joint router face down
• Right hand 90° joint - female joint router face down - male joint router face up
Clamp the jig in position once lined up following the above left or right format. Then cut through in three stages of 12mm depth increments. Repeat on opposite joint. To ensure a clean square edge use a straight edge guide offset to suit the router for both joints.
Form pockets to suit No. 20 biscuits using a biscuit jointing machine, cutting pockets 20mm down from the top face between bolt slots. Do not cut pockets over bolt slots. Use one biscuit between each connector bolt. Then prepare the worktop bolt connectors.Cut out worktop jointing bolts (3 for 650mm, 4 for 900mm width)
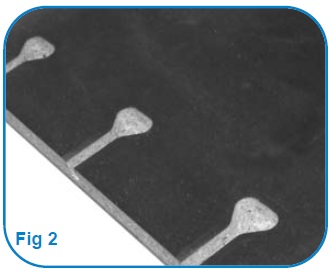
It is very important to clean the edges of the join using industrial denatured alcohol, avoid applying cleaner to the chipboard area. Allow to evaporate dry and assemble as soon as possible to avoid having to clean the surface again.
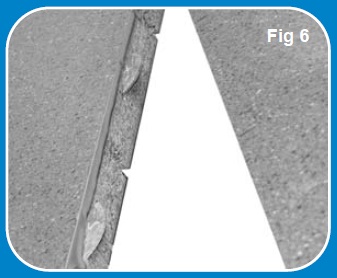
Apply a bead of adhesive in each biscuit cut-out and fit the biscuits. Apply two beads of adhesive along the entire length of the joint, the first along the top edge of the cut, the second 5mm up from the bottom.
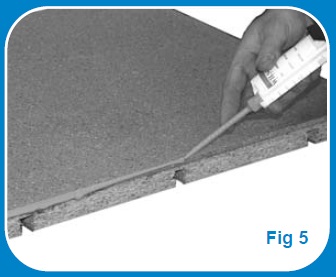
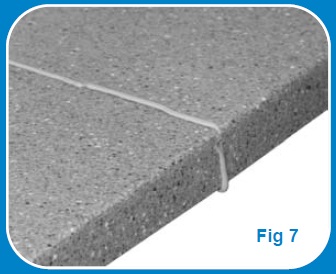
Without further delay, aligning the front inner faces bring the worktop pieces together. This will help create squeeze out and achieve a seamless and secure joint. Insert the connection bolts and use a 10mm spanner to bring the elements together. Do not over tighten.
Do not remove any excess squeezed out adhesive at this time as the adhesive will shrink while drying. Please allow approximately 40minutes for the adhesive to harden. If adhesive has been spilled anywhere else on the worktop it can be wiped of using industrial denatured alcohol.
Carefully remove the excess bead of adhesive using a hand plane.
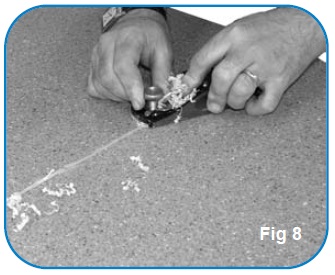
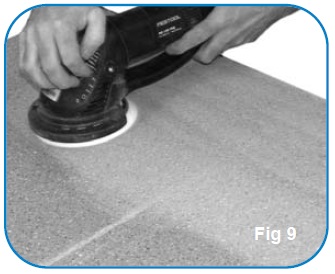
Using a good quality random orbital sander ensure the full surface is sanded evenly. Do not sand along the joint line only, feather out over a larger area to avoid trenching.
Butt Joint:
To create a secure and seamless join the worktop edges must be parallel. First the worktop edges to be bonded have to be milled at right angles and then straight.
Cut out the recesses for the underside bolt connectors. Using a biscuit jointing machine form pockets to suit No.20 biscuits.
Cut pockets 20mm down from the top face between bolt slots. Do not cut pockets over bolt slots. Use one biscuit between each connector bolt.
It is very important to clean the edges of the join using industrial denatured alcohol, avoid applying cleaner to the chipboard area. Allow to evaporate dry and assemble as soon as possible to avoid having to clean the surface again.
Apply two beads of adhesive along the entire length of the joint, the first along the top edge of the cut, the second 5mm up from the bottom.
Apply adhesive to the biscuit grooves. Apply a final bead of adhesive along the edge of the top surface and front and back edge. This will help create squeeze out and achieve a seamless and secure joint.
Without further delay bring the two worktops together aligning the front inner faces. Insert the connection bolts and tighten (Do not over tighten.)
Do not remove any excess squeezed out adhesive at this time as the adhesive will shrink while drying. Please allow approximately 40minutes for the adhesive to harden. If adhesive has been spilled anywhere else on the worktop it can be wiped of using industrial denatured alcohol.
Carefully remove the excess bead of adhesive using a hand plane.
Using a good quality random orbital sander ensure the full surface is sanded evenly. Do not sand along the joint line only, feather out over a larger area to avoid trenching.

Leave a Reply Cancel Reply
All fields are required